Chris Baker regularly photographs nature on a different wavelength. Literally. Don’t know what we mean? We’ll explain. Chris uses Infrared (IR) photography techniques to create otherworldly images.
Chris has a day job, as an engineer for NASA and while you might think that photography as an art and engineering are polar opposites of one another, Chris explains that he uses the same thought processes for both.
While photography is considered an art, there is a science and technical side that engages my engineering, problem-solving side. My initial goal was understanding how the camera works, which came very natural for me. Once I had a fundamental understanding of the science of shutter speed, aperture, ISO, lenses, sensor types, and histograms, I felt like I could adapt to any genre of photography.
Another parallel between engineering and photography, is my approach to shooting. When I’m confronted with a scene, I treat it like I would any engineering problem. I go through a logic or decision flow that will guide my creative choices. What lens is required? Am I wanting to control depth of field (aperture) or motion (shutter speed)? Is a filter required? Should I shoot from a high perspective or low?
For Chris, the small details matter. And perspective is used to engage the viewer of his nature and wildlife images. He’ll deconstruct his favorite photos to understand why he’s drawn to them, then look for opportunities to apply those techniques in his own work.
Infrared Photography Primer
Chris first ventured into Infrared photography in mid-2021, using a filter on the lens of his Z 6II. Within a short time he was hooked and invested in a converted Nikon camera body the next year.
Chris explains that the Hoya R72 (720nm) filter is a popular starting point for Infrared photography. It produces very strong, traditional monochrome Infrared images because it limits the amount of visible light entering the lens. And with some post-processing finesse, can generate false color images.
“The trick,” he says, “becomes working around the internal IR blocking filter incorporated into DSLR and mirrorless camera bodies.” You’ll need to use long shutter speeds, even on a bright sunny day, up to 30 – 90 seconds, which will limit you to shooting subjects that aren’t moving.
Inner Workings of Infrared Photography
Visible light occupies a very small part of the electromagnetic spectrum with wavelengths ranging from 380 to 750nm. Infrared is at the longer wavelength, just above (>750nm).
All standard digital cameras have an internal, physical filter that blocks IR wavelengths from reaching the sensor. When converting a camera for infrared, this filter is removed and replaced with a filter that accepts the longer IR wavelengths (rejecting the shorter visible light wavelengths).
If you’re only interested in pure B&W images and maximizing the natural contrast of IR, then an 830nm can be installed that will accept only IR wavelengths (> 830nm). However, if the photographer is interested in generating false color images, a filter is installed with a wavelength cutoff that allows a mixture of visible and IR light. The more visible light allowed, the stronger the false color image. These “color” IR filters will have wavelength ranges from 720nm (weak color) to 470nm (strong color).
Fortunately, special lenses are not required for infrared.
But, photographers shooting with Infrared converted DSLR cameras have to compensate while focusing for the fact that there’s a difference in the wavelengths of Infrared light vs. visible light. You’d do this by either calibrating the focus of your AF lenses to work properly or manually focus and use the red IR focus scale on the lens.
Mirrorless cameras however, due to their design, actually compensate for the focus shift and are ideal for converting to Infrared photography only.
The other issue you may run into with your lens choice is a lens “hot spot” or bright, hazy circle that appears in the center of an IR image mainly due to the anti-reflective coatings on the lens. Hot spots vary in degree with some lenses being unusable and others exhibiting nothing. Mild or light hot spots can be corrected in post-processing. Fortunately, lens databases have been created to characterize hot spot potential and should be consulted when selecting lenses for IR photography.
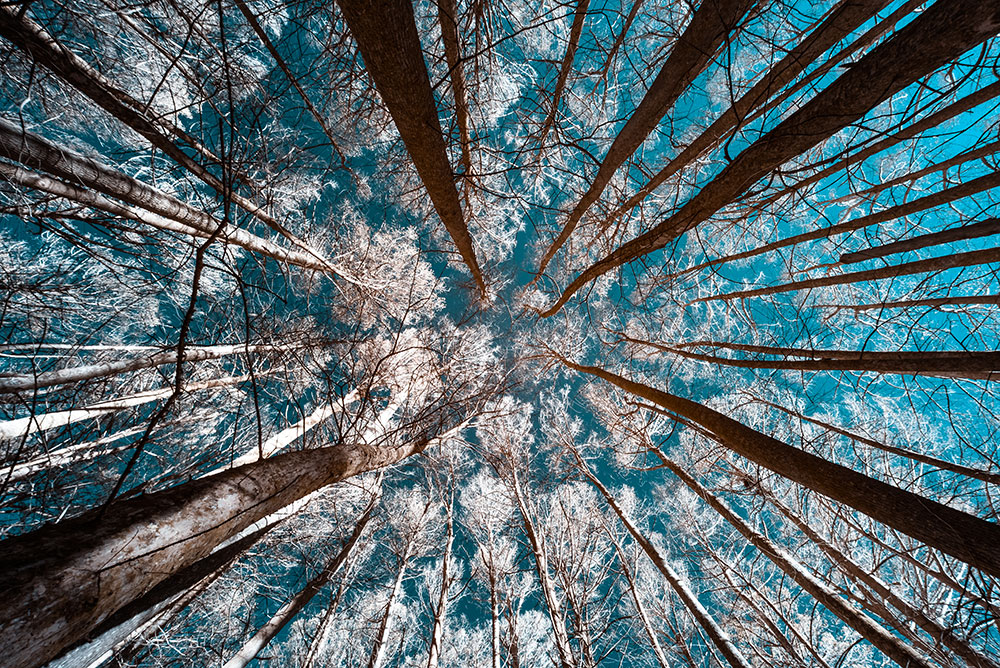
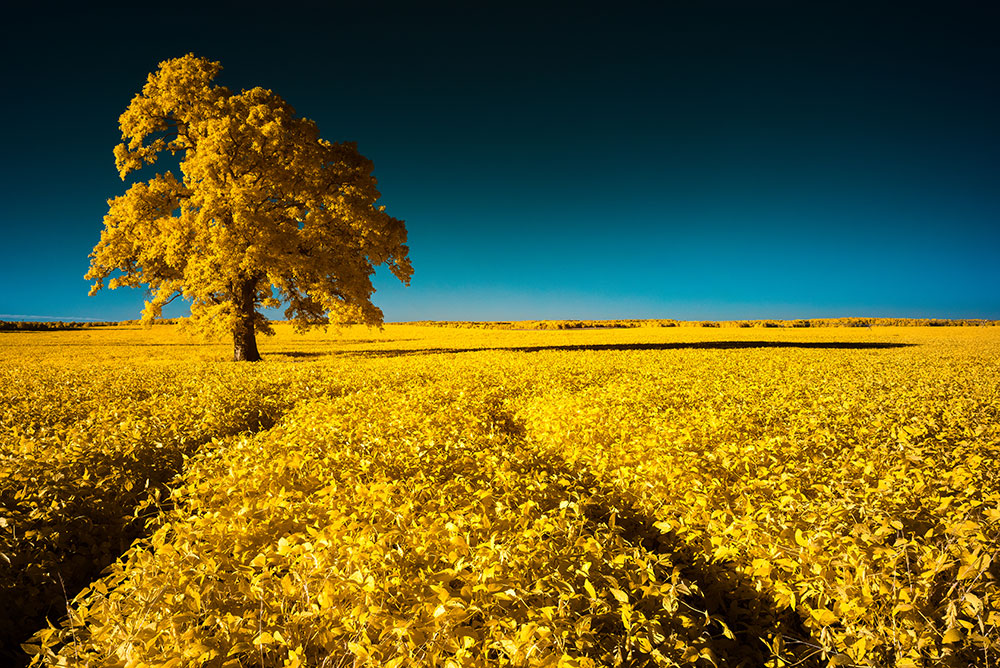
Lastly, you’ll want to set a custom white balance, either in the camera or in post-processing software. My workflow involves the latter. Even with a proper white balance, the skies in false color IR images will take on a red tone. So, I’ll use Adobe Photoshop to perform a “channel swap”, where the red and blue channels are swapped to restore the sky to blue. Then further adjustments to the other color channels can manipulate the hue and saturation of foliage to yellow or pink or white.
Chris has one Nikon Z 5 that is converted to Infrared with a 590nm supercolor filter.
This filter allows me to produce strong false color images, while still retaining enough contrast to convert into B&W in post-production if I decide to produce a more traditional monochrome IR image.
For scenarios where I know I’ll want a black and white image, I’ll attach my 720nm external filter to limit the visible light even further and isolate more of the IR spectrum.
Eye-catching Subjects
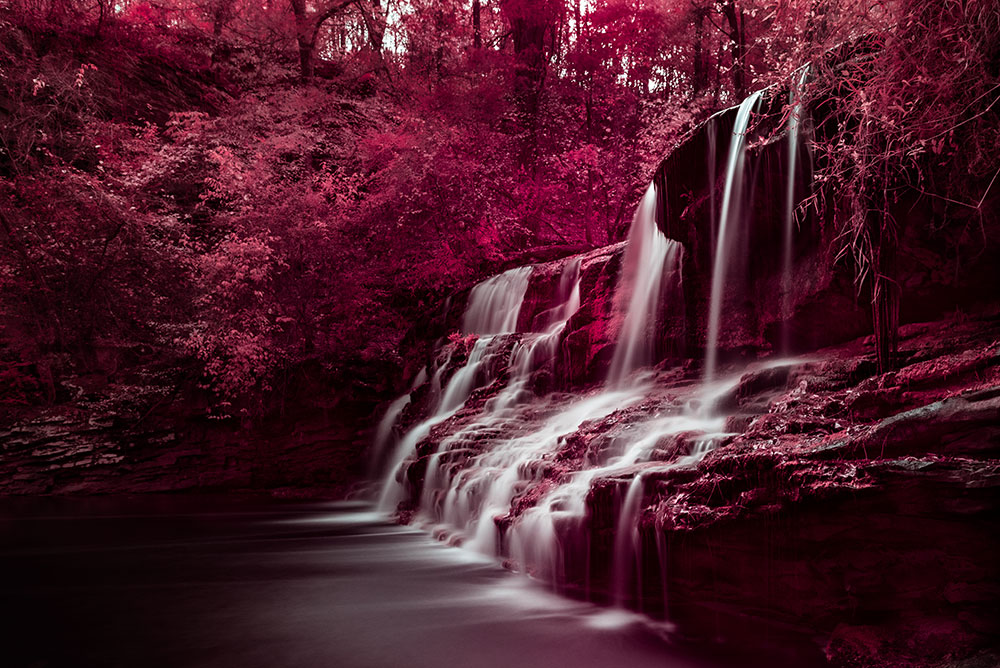
Chris says nature and landscape photography is his first love. Noting that Infrared photography is at its most effective in nature scenes with the way foliage and water and sky contrast. Objects that absorb IR light, such as sky and water, will render very dark and objects that reflect IR will render very bright.
It’s such a different and distinctive look that cannot be replicated in software. I’ve always enjoyed the challenge of taking something familiar and finding a unique way of shooting it, whether it’s trying different lenses or changing camera angles or experimenting with artificial lighting. Infrared is yet another tool to add to my toolbox for this purpose.
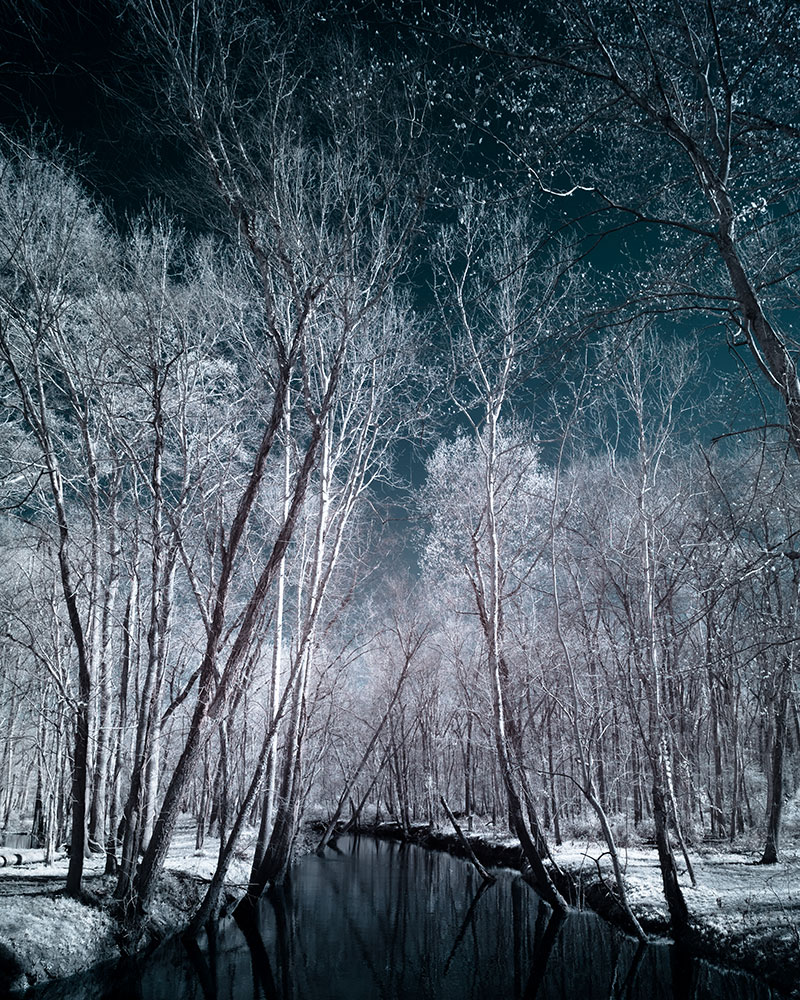
With monochrome IR imagery, textures and patterns in nature that are normally hidden by dark greens in leaves or bright colors in flowers become more prominent. In false color imagery, I’m not bound by traditional colors. Trees and grass can become yellow or magenta or pink or blue and give a scene a dream-like or other-worldly quality.
We asked Chris which subjects he felt worked better for Infrared photography.
Any scene with live foliage tends to look better in infrared because the typical green leaves and blue skies are not a dynamic color combination.
Think about the popularity of photographing fall foliage, he explains, where photographers will flock to capture the changing leaves because they’re more interesting and appealing to see. IR offers this same visual appeal but I can shoot in the middle of the day in the heat of the summer and generate a false color image of a tree in pink or yellow contrasted against a deep blue sky. Or, take that same scene and render it in B&W to make the foliage appear white against a black sky giving the scene a wintery look.
Problem solving
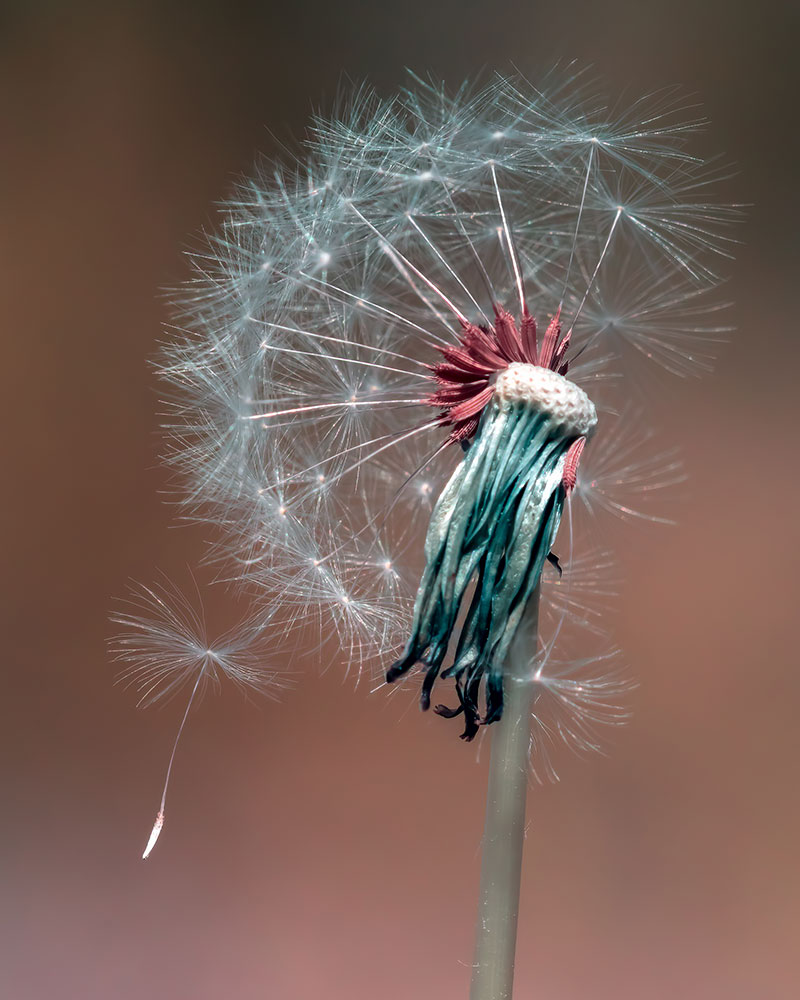
While Chris has a love for nature and wildlife, he says he’ll experiment in most other genres as it satisfies his problem-solving nature. “Each has its own unique challenges and I love that problem solving aspect and opportunity to expand my knowledge.” He also does a lot of macro shooting—of flowers and insects.
He says that the most successful images document some type of interesting behavior.
“To capture those moments requires patience, persistence, a tolerance for bugs, and a willingness to get dirty, as I prefer to shoot from very low angles”, he concludes.
Chris Baker
Chris Baker spends much of his free time photographing wildlife and nature, but you can find him on the sidelines of high school basketball games, capturing college theater productions, as well as taking corporate and actor headshots, weddings, and family portraits. He also dabbles in night sky photography. He’s an active member in his local camera club and has even put together Infrared Photography tutorials to share with others. His landscape, nature, and wildlife photos have been featured in Alabama the Beautiful Magazine and have won awards in contests sponsored by Outdoor Alabama, Audubon Society, Audubon Community Nature Center, National Wildlife Federation, Bird Watching Magazine, and Birds and Blooms Magazine. During the day, Chris is an engineer working for NASA at the Marshall Space Flight Center.
See more of Chris’ work on his website cscottphoto.smugmug.com
And Instagram: instagram.com/c_scott_photo